A tkinter issue

Joined
Jun 9, 2024
Messages
3
Reaction score
0
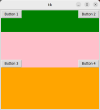
hello everyone i have a problem with my code i am making a calculator using tkinter so the problem is that there is a label called 'one_button' which won't stick to the left border of the screen here is the code:

from tkinter import *
import tkinter
top = tkinter.Tk()
top.title("calculator")
top.geometry("600x640")
top.configure(bg="grey")
res = Frame(top)
row1 = Frame(top)
row2 = Frame(top)
row3 = Frame(top)

result_area = Text(res, width=75, height=7)

def one_pressed():
pass

one_button = Button(row1, text="1", command=one_pressed, width=10, height=4)

res.grid(row=0, column=0, columnspan=3)
row1.grid(row=1, column=0, columnspan=3)
row2.grid(row=2, column=0, columnspan=3)
row3.grid(row=3, column=0, columnspan=3)
result_area.grid(row=0, column=0, padx=10, pady=10)
one_button.grid(row=0, column=1, padx=10, pady=12, sticky='w')
top.mainloop()


i hope you can help me
 
Joined
Jul 4, 2023
Messages
416
Reaction score
50
Do you tried in that way?
Python:
from tkinter import *
import tkinter

# Create the main window
top = tkinter.Tk()
top.title("Calculator")
top.geometry("600x640")
top.configure(bg="grey")

# Prevent the window from being resized
top.resizable(False, False)

# Create frames to organize the layout
res = Frame(top)
row1 = Frame(top)
row2 = Frame(top)
row3 = Frame(top)

# Create the result display area
result_area = Text(res, width=72, height=7)

# Define the function for button press (currently does nothing)
def one_pressed():
    pass

# Create buttons for the calculator
one_button = Button(row1, text="1", command=one_pressed, width=10, height=4)
two_button = Button(row1, text="2", command=one_pressed, width=10, height=4)
three_button = Button(row1, text="3", command=one_pressed, width=10, height=4)
plus_button = Button(row1, text="+", command=one_pressed, width=10, height=4)

# Place the frames in the main window using grid layout
res.grid(row=0, column=0, sticky='ew')
row1.grid(row=1, column=0, sticky='ew')
row2.grid(row=2, column=0, sticky='ew')
row3.grid(row=3, column=0, sticky='ew')

# Place the result area inside its frame
result_area.grid(row=0, column=0, padx=10, pady=10, sticky='ew')

# Place the buttons inside the first row frame
one_button.grid(row=0, column=0, padx=10, pady=12, sticky='w')
two_button.grid(row=0, column=1, padx=0, pady=12, sticky='w')
three_button.grid(row=0, column=2, padx=10, pady=12, sticky='w')
plus_button.grid(row=0, column=3, padx=0, pady=12, sticky='w')

# Start the Tkinter event loop
top.mainloop()

and check even in that way:
Python:
from tkinter import *
import tkinter


# Define the function for button press
def button_pressed(value):
    # For the purpose of presentation
    result_area.config(state=NORMAL)   # Temporarily make the result area editable,
    result_area.insert(END, value)     # insert the text,
    result_area.config(state=DISABLED) # then make it readonly again


# Create the main window
top = tkinter.Tk()
top.title("Calculator")
top.geometry("600x640")
top.configure(bg="grey")

# Prevent the window from being resized
top.resizable(False, False)

# Create frames to organize the layout
res  = Frame(top, padx=10, pady=10)
row1 = Frame(top, padx=10, pady=10)
row2 = Frame(top)
row3 = Frame(top)

# Create the result display area
result_area = Text(res, width=72, height=7, state=DISABLED)

# Create buttons for the calculator
one_button   = Button(row1, text="1", command=lambda: button_pressed("1"), width=10, height=4)
two_button   = Button(row1, text="2", command=lambda: button_pressed("2"), width=10, height=4)
three_button = Button(row1, text="3", command=lambda: button_pressed("3"), width=10, height=4)
plus_button  = Button(row1, text="+", command=lambda: button_pressed("+"), width=10, height=4)
four_button  = Button(row1, text="4", command=lambda: button_pressed("4"), width=10, height=4)

# Place the frames in the main window using grid layout
res.grid (row=0, column=0, sticky='ew')
row1.grid(row=1, column=0, sticky='ew')
row2.grid(row=2, column=0, sticky='ew')
row3.grid(row=3, column=0, sticky='ew')

# Place the result area inside its frame
result_area.grid(row=0, column=0, padx=0, pady=0, sticky='ew')

# Place the buttons inside the first row frame
# padx(left, right)     pady(top, bottom)
one_button.grid  (row=0, column=0, padx=(0, 5), pady=(0, 5), sticky='w')
two_button.grid  (row=0, column=1, padx=(5, 5), pady=(0, 5), sticky='w')
three_button.grid(row=0, column=2, padx=(5, 5), pady=(0, 5), sticky='w')
plus_button.grid (row=0, column=3, padx=(5, 0), pady=(0, 5), sticky='w')
four_button.grid (row=1, column=0, padx=(0, 5), pady=(5, 5), sticky='w')

# Start the Tkinter event loop
top.mainloop()
 
Last edited:
Joined
Dec 10, 2022
Messages
82
Reaction score
24
First, you should not use wildcard import eg from tkinter import *. This can cause unwanted effect.
Generally when I'm writing a tkinter gui I use a combination of columnconfigure, rowconfigure, and sticky.

Here is a quick example

Python:
import tkinter as tk
root = tk.Tk()
root.geometry('400x400+300+300')
root.configure(padx=4, pady=4)
# Columnconfigure gives precedents. The higher the number the greater the weight
root.columnconfigure(0, weight=1)
root.rowconfigure(0, weight=1)

# Container holds all widgets
container = tk.Frame(root, bg='orange')
container.grid(column=0, row=0, sticky = 'news') # The sticky ensures contents are pulled in all directions here
# Configuring columns. This can be done individually or in a loop
container.grid_columnconfigure(0, weight=3, uniform='row') # uniform ensures columns are same width and height
container.grid_rowconfigure(0, weight=1)
container.grid_rowconfigure(1, weight=2)
container.grid_rowconfigure(2, weight=3)

row1 = tk.Frame(container, bg='green')
row1.grid(column=0, row=0, sticky='news')
row1.columnconfigure(0, weight=3, uniform='row')
row2 = tk.Frame(container, bg='pink')
row2.grid(column=0, row=1, sticky='news')
row2.grid_columnconfigure(0, weight=3, uniform='row2')
row2.grid_columnconfigure(1, weight=3, uniform='row2')
row2.grid_rowconfigure(0, weight=3, uniform='row')

btn1 = tk.Button(row1, text='Button 1')
btn1.grid(column=0, row=0, sticky='nw') # This sticky is pulling btn1 northwest
btn2 = tk.Button(row1, text='Button 2')
btn2.grid(column=1, row=0, sticky='ne') # This sticky is pulling btn2 northeast
btn3 = tk.Button(row2, text = 'Button 3')
btn3.grid(column=0, row=1, sticky='sw')
btn4 = tk.Button(row2, text='Button 4')
btn4.grid(column=1, row=1, sticky='se')
root.mainloop()
 

Attachments

  • Kazam_screenshot_00000.png
    Kazam_screenshot_00000.png
    5.5 KB · Views: 4
Last edited:

Ask a Question

Want to reply to this thread or ask your own question?

You'll need to choose a username for the site, which only take a couple of moments. After that, you can post your question and our members will help you out.

Ask a Question

Members online

Forum statistics

Threads
473,824
Messages
2,569,755
Members
45,745
Latest member
JohannaLev

Latest Threads

Top